Table of Contents
In the past, the process of web scraping required coding skills or hiring a programmer to develop a web scraper for you. However, this has changed now as there are web scraping tools that have been developed for people without coding skills. One such tool that is available to non-coders is the Apify service.
Apify is a service that powers the Apify platform, which is designed to assist both coders and non-coders in automating web data extraction and other repetitive tasks. If you’re on this page because you’re familiar with this platform, it’s likely that you don’t know how to use it effectively.
In this article, we will be guiding you through the process of using the Apify service and its range of tools to easily and effectively extract data from the web. Before we delve into that, let’s take a quick look at an overview of the Apify platform.
Overview of Apify
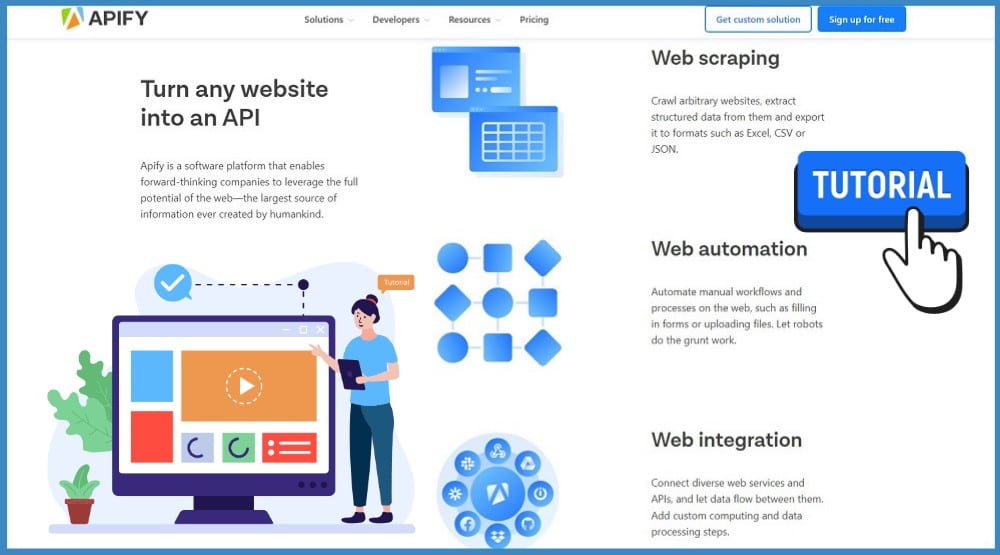
The Apify platform is a web automation service that can help users automate tasks that can be done manually on browsers. Although the homepage claims that the service can automate “anything”, it may not be entirely accurate.
I can confirm that they are useful for automating your web actions. However, they are more commonly used as a web scraping platform due to their specialized web scrapers. These scrapers are designed to extract data from specific websites.
Aside from the web scrapers and automators that are built into the system, users can also utilize third-party scrapers developed by independent programmers.
It is possible to create a custom tool and offer it to others for a fee, but this requires coding skills. However, if you lack these skills, you can still extract any desired data by using an Apify actor. This platform was designed specifically for those without coding knowledge.
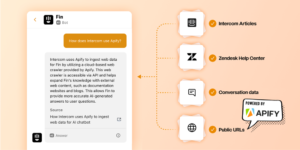
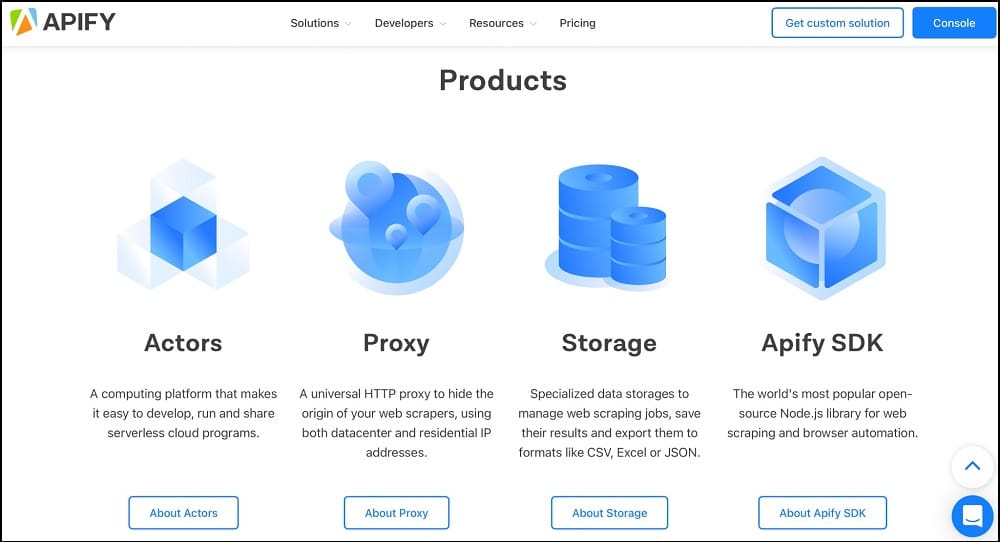
Apify is a service that is trusted and used by many big names worldwide. The service offers web scrapers called actors as well as other tools such as proxies, specialized data storage service, and an SDK for developers. Although Apify is a paid service, it does offer a free plan that can be used for some tasks.
Apify Interface
Unless you’re a developer interested in integrating the service into your custom tool, there’s no need to download any tools to use Apify. All you need is a web browser to access the service and download scraped data. The service provides a user dashboard that you can use to access the platform.
I suggest that you register an account and follow me as I describe the interface and provide a step-by-step guide on how to use the platform. Earlier, we mentioned that Apify is a paid platform. However, it’s not entirely paid, as it offers a free plan that allows you to perform some web scraping tasks.
It also provides free shared proxies, which can be useful on certain popular websites. When you log in to the user dashboard, you will see the screen below.
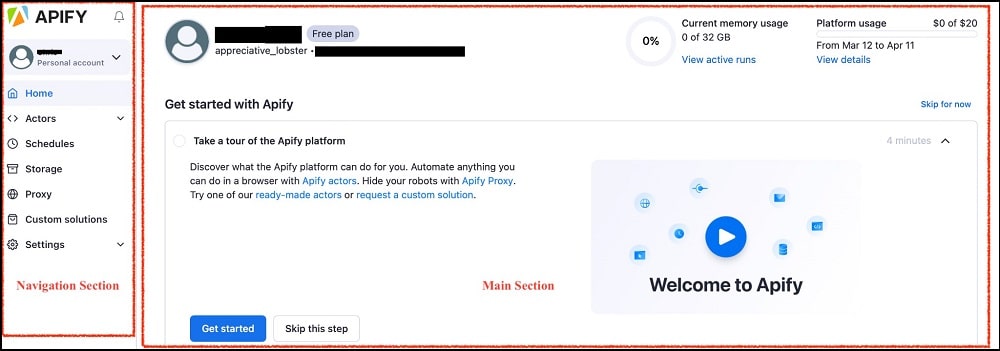
As you can see, there are two sections on the page – the navigation section and the main section. The main section is where you can perform all of the necessary tasks. On the other hand, the navigation section remains consistent throughout the pages, providing you with quick access to all of the tools, regardless of the page you are on.
Actors: The Actor tab is the most crucial part of the tool. It enables you to run web scraping tasks or any other tasks that you are interested in. In this tab, you will find the actor stores that provide you with a list of supported actors or web scrapers. Additionally, you can navigate to a separate tab that allows you to create your own actor if you possess coding skills.
Schedules: The Schedules tab in Apify is designed primarily for scheduling tasks. You may find it useful to know that Apify supports task scheduling, which allows you to automate your scraping tasks at specific intervals without having to be actively logged in. This feature is especially helpful for collecting data that needs to be updated at regular intervals.
Storage: Apify supports specialized data storage to manage web scraping jobs, save results, and export in CSV, Excel, or JSON formats.
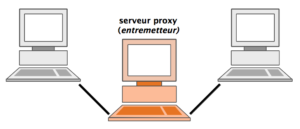
Apify Proxy: Please keep in mind the following information: This tab will guide you to Apify’s proxy service and provide instructions on how to activate and configure it to work with your actors. When web scraping, it is often necessary to use proxies to avoid IP tracking and blocking or to access geolocation-specific content. Apify offers both residential and datacenter proxies to meet your requirements.
Custom Solutions: If you need to collect data that is not supported by any of the web scrapers or actors available in the store, and you are not a coder who can develop an actor to get that done, then you can use this tab to request for the actor to be built for you. This will take you to the page where you can make your request.
Settings: The settings area is straightforward. Here, you can edit your profile, update billing info, and obtain your personal API token to integrate Apify with other internet tools.
How to use Apify Scrapers for Web Scraping
The platform offers extensive support for specialized actors, including but not limited to Amazon Scraper, Google SERP Scraper, Google Map Scraper, Instagram Scraper, Facebook Scraper, Twitter Scraper, YouTube Scraper, Contact Details Scraper, and numerous others. To explore the complete list of supported scrapers, you can visit the Apify Actor store.
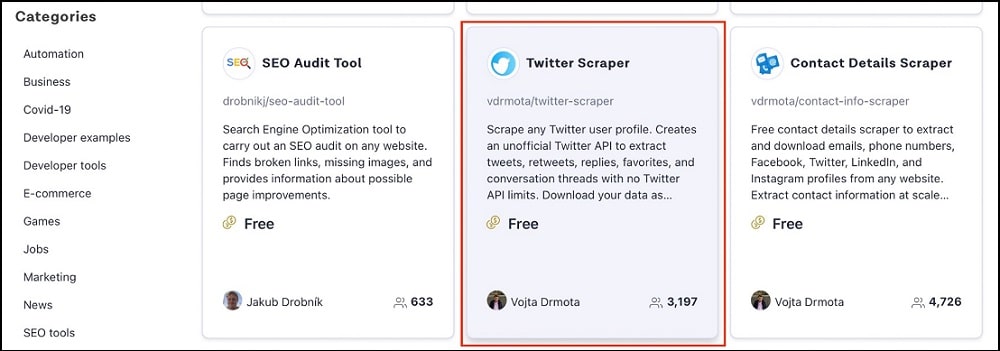
The platform offers assistance for a versatile web scraping tool, allowing you to extract various publicly available data from the Internet. In this guide, we’ll specifically employ the Twitter Scraper to gather tweets, replies, retweets, and additional details from a user without encountering any API limitations. The outlined steps are as follows.
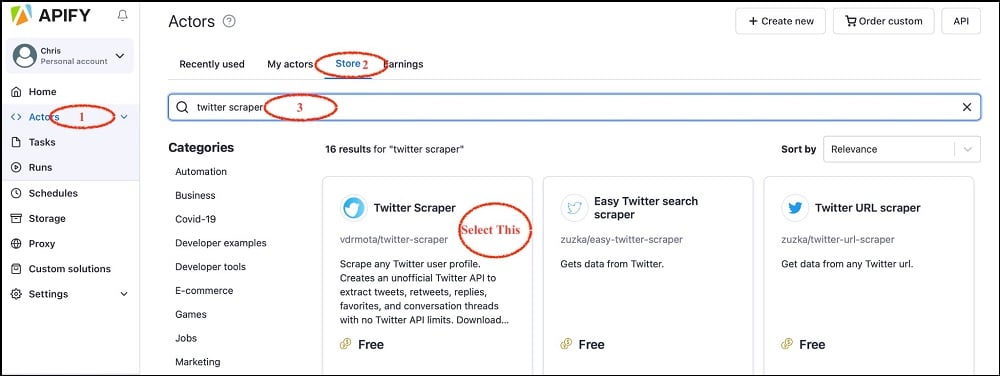
Step 1: Log in to the user dashboard (https://console.apify.com/) using your username and password.
Step 2: Navigate to the Actors tab, followed by the Store tab, to access the available list of Actors. Utilize the search input field by entering “Twitter Scraper” and choose the option labeled Twitter Scraper from the presented results.
Step 3: Upon choosing the Twitter Scraper and clicking on it, the interface will open, allowing you to define parameters and configure the web scraper for execution. The following is the interface you should encounter.
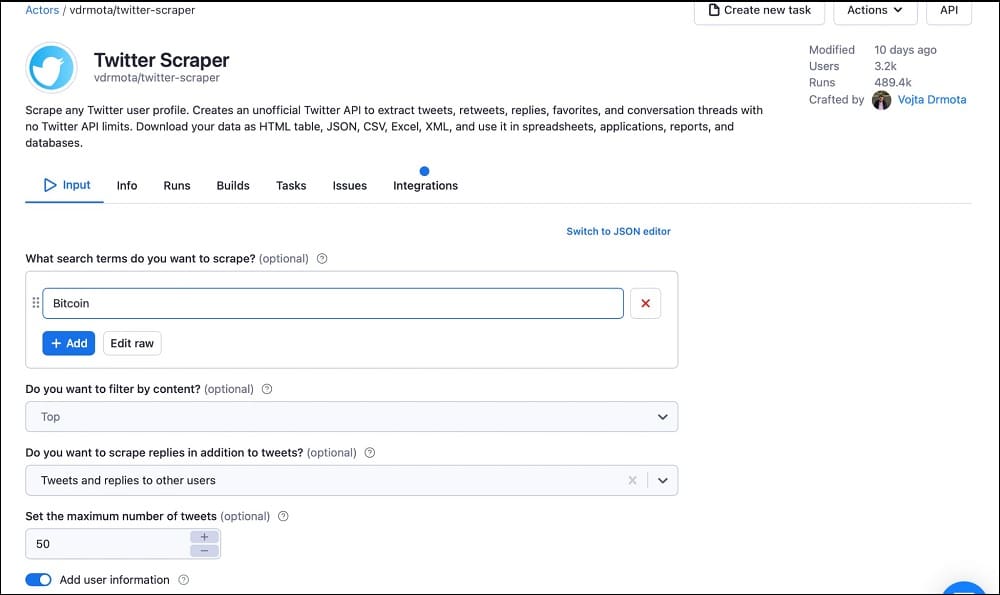
Step 4: Typically, the primary focus lies on the Input tab. The required settings in this section are self-explanatory. The initial field prompts you to input a search term, which will be utilized to search for tweets. It is crucial for specifying keywords and hashtags.
The remaining configurations are likewise self-explanatory. Generally, the tool is equipped with a default configuration that only requires adjustments if you have specific requirements. As you scroll down, you will encounter the following.
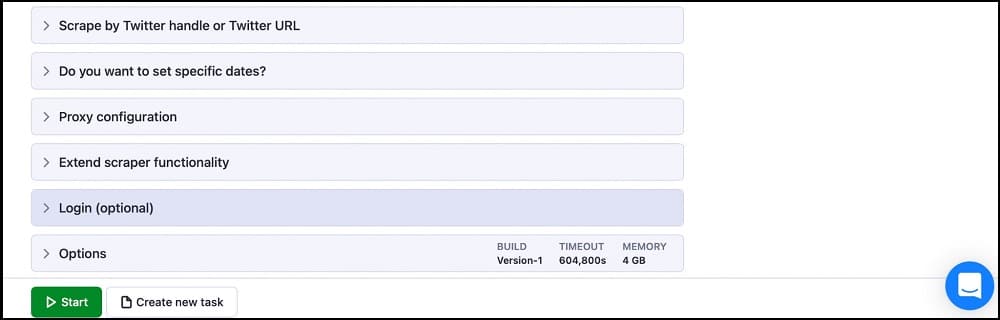
Step 5: With the exception of the Proxy Configuration, all the other settings displayed in the screenshot above are optional. You can click on each of them and customize the settings based on your understanding of how to utilize them. The primary objective is to guide you on using an actor, and therefore, we may not delve into overly detailed explanations for each configuration.
Step 6: Navigate to the Proxy Configuration tab. You have the option to either use your own proxies or utilize the free proxies offered by Apify. I personally opt for the proxies provided by Apify at no cost.
Step 7: After completing all the necessary configurations, proceed to click the “Start” button, initiating the web scraper to commence collecting the desired data for you.

Step 8: Upon successful completion of the scraping job, you will be presented with the interface shown below.
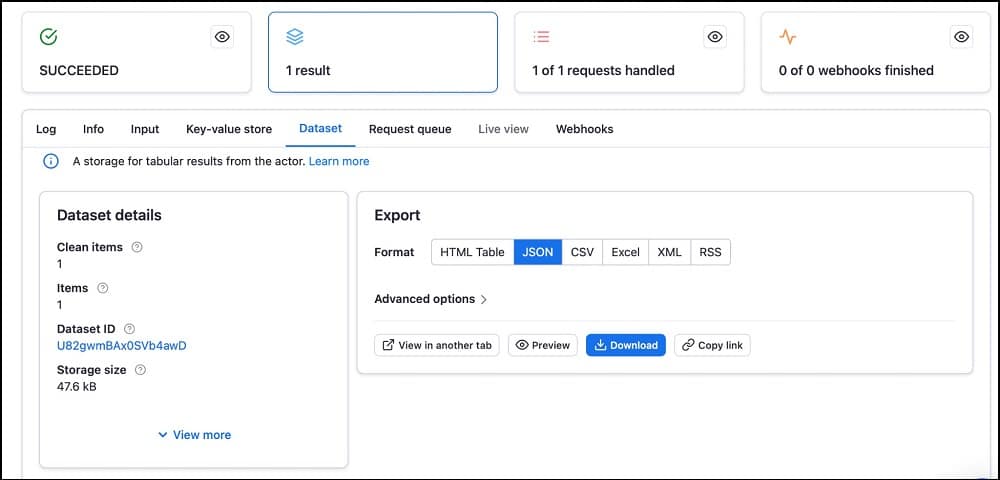
The interface is straightforward. In the “Export” section on the page, you’ll find supported formats such as HTML table, JSON, CSV, Excel, XML, and RSS. Select your preferred format and click the download button. Additionally, you can click on the preview option to review the data before initiating the download.
How to Setup Proxies for Apify
Similar to many web scrapers, the Apify service offers proxy support, essential for bypassing IP-based blocks and accessing geo-targeted or restricted content online. Apify provides three options for using proxies:
-
- Utilize proxies from any provider of your preference.
-
- Purchase proxies from the Apify proxy service.
-
- Employ the free shared proxies offered by the platform.
This section of the article will concentrate on integrating proxies from third-party providers.
Step 1: Visit a provider of your choosing and procure the required proxies. Excellent options for web scraping include Bright Data, Smartproxy, and Soax.
Step 2: Retrieve the proxy address, port, username, and password from the proxies you purchased. The process of obtaining this information may differ among providers, so it is advisable to contact your chosen provider for specific instructions.
Step 3: Navigate to the user dashboard and select the actor you intend to use. The process of configuring proxies may vary among different actors, but the basic principles remain consistent.
Typically, the proxy settings are located under the Input tab, often under headings such as “Proxy and Browser Configuration” or “Proxy Configuration.” Clicking on it will typically reveal settings that resemble the following.
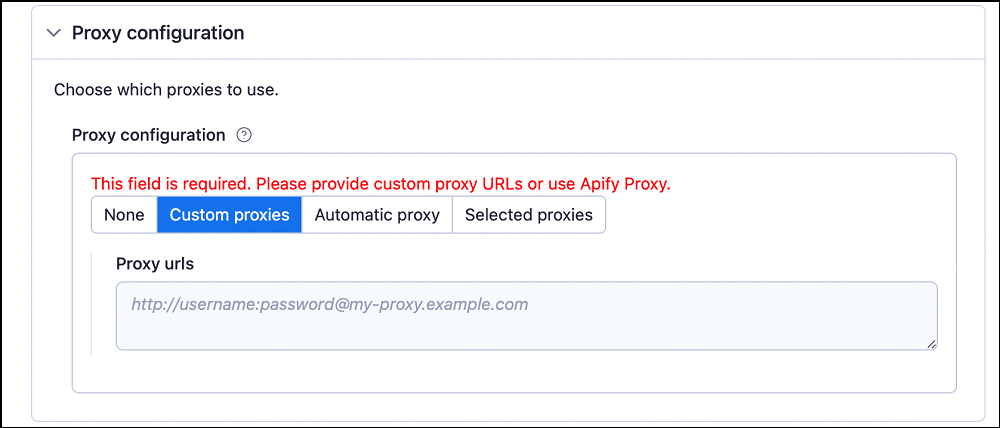
Step 4:
Navigate to the “Custom Proxies” tab and input the proxy details in the provided URL format. For instance, if the proxy address is endpoint1.proxynode.com, the port is 8080, the username is user1, and the password is pass1, the format should be https://user1:pass1@endpoint1.proxynode.com:8080.
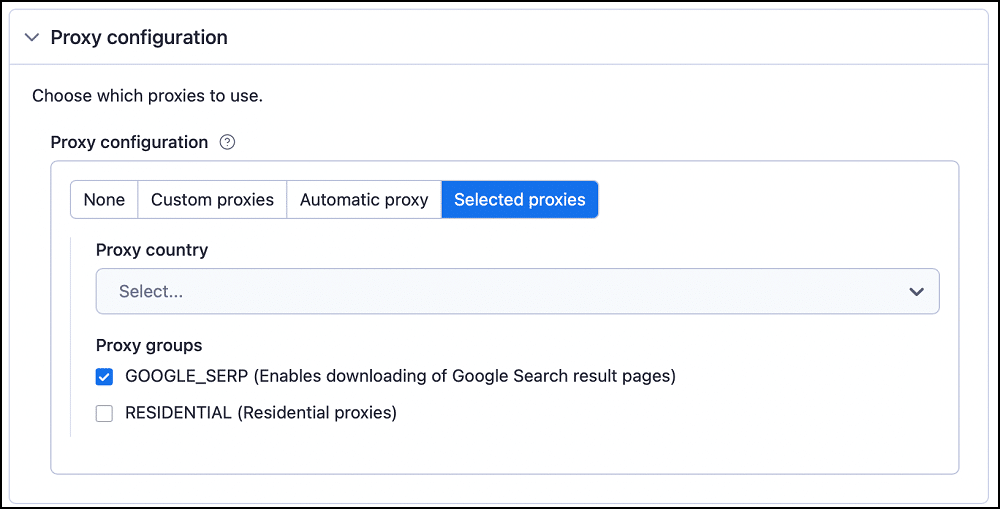
Step 5: Once you’ve completed the proxy settings, proceed with configuring the remaining options and initiate the scraper. Alternatively, you can utilize the “Automatic” tab instead of the “Custom Proxies” tab to obtain proxies from the Apify service. Note that access to the “Automatic” tab is available only with a proxy subscription. For free proxies, opt for the “Selected Proxies” option.
Step 6: The initial option in the proxy settings is self-explanatory – selecting it means your request will not be routed through any proxy service. While this option may function for certain tasks, many tasks would likely be rejected, making scraping difficult. If you lack a proxy subscription or cannot afford one, the optimal choice is to use the “Selected Proxies” option and choose from the available pools.
How to Schedule Web Scraping Tasks Using Apify
One notable feature within the Apify platform is the capability to schedule scraping tasks. If you need to regularly collect data from a website, scheduling the task is an efficient way to automate the process, eliminating the need for manual intervention on a daily or weekly basis.
In this part of the article, we will guide you through the process of scheduling scraping tasks using the Apify platform.
Step 1: Access the user dashboard and log in to your account. This guide presupposes that you are already familiar with the process of scraping data using Apify and have previously employed an Apify actor. Without completing these initial steps, you won’t have any actors available for scheduling tasks. If you haven’t done so, follow the outlined procedures above to learn how to scrape data using Apify actors and use one, ensuring you have an actor ready for scheduling tasks as per this guide.
Step 2: Select the “Schedules” tab from the navigation section of the user dashboard. This action will open a page where the list of schedules should be empty, as you haven’t scheduled an actor to run yet.
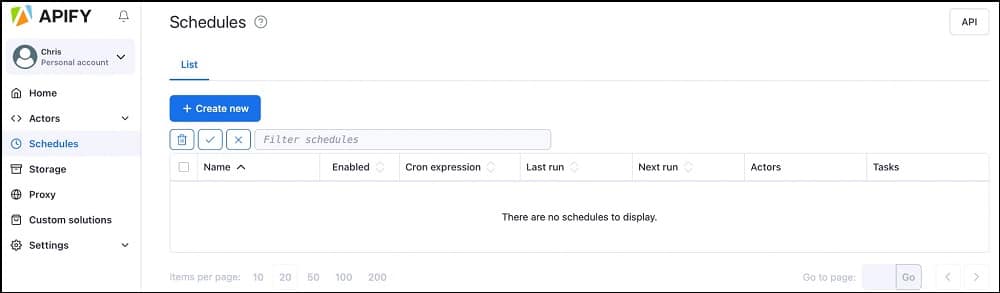
Step 3: Select the “+ Create new” button to initiate the creation of a new schedule. This action will open a page where you can configure the schedule, featuring four tabs: Settings, Actors, Tasks, and Log.
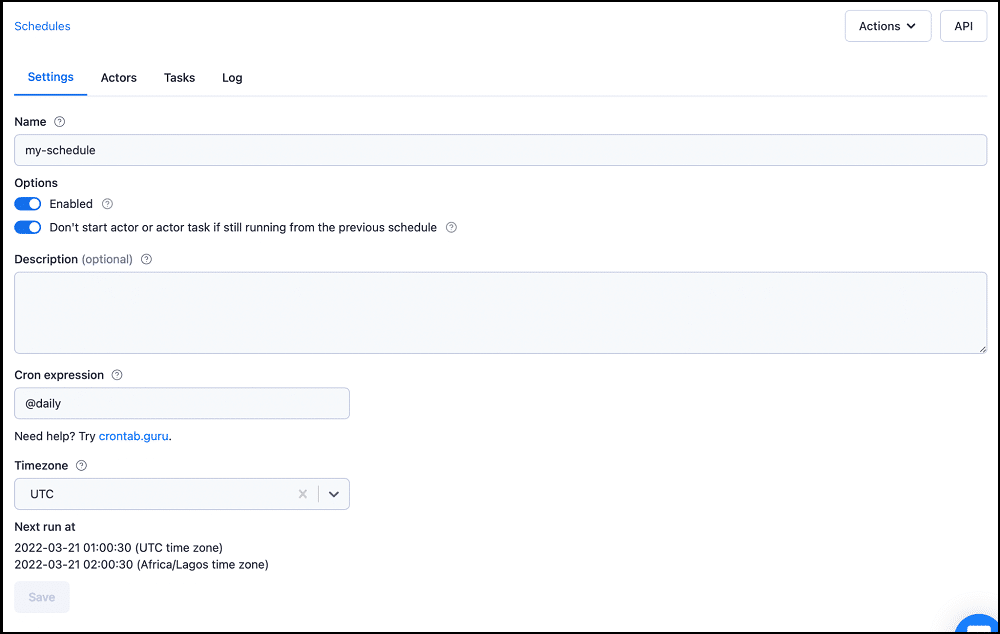
Step 4: Assign a name to the schedule, specify whether you prefer the scraping to occur daily or weekly using the Cron expression option, and select the timezone that is most suitable for your location.
Step 5: Navigate to the “Actor” tab and click on the “+ Add Actor” button to include an actor in the schedule. A list of actors you have utilized previously will be displayed.

Step 6: Configure the actor as you would for a standard scraping task and then click the “Save” button. The actor will be appended to the list. Multiple actors can be added to the same schedule, and they will run concurrently.
Step 7: Return to the setting tab, scroll down, and click on the “Save” button. Your actor is now set to run at the scheduled intervals.
FAQs About Apify Scraper
Q. Is Web Scraping Free on Apify?
The cost of using the Apify platform varies, offering both free and paid tools. Pricing may appear complex, especially for first-time users, as the core of the platform involves a paid system for running actors. While some actors are free, others, especially those developed by third-party contributors, may be paid. High-quality proxies are also available for purchase. However, even though the platform primarily operates on a paid model, registering as a free user grants a $5 monthly credit for use. This allows access to free actors and shared proxies at no cost.
Q. Does Apify have an API for Developers?
Apify caters to both developers and non-coders. For developers, the platform provides direct access to actors for integration into code, eliminating the need for web interface usage. The Apify package can be incorporated into code seamlessly, with comprehensive API documentation available for easy understanding and rapid development. Developers can refer to the official Apify Developer API Documentation for further details.
Q. Can Apify Scrape Modern Websites?
Apify is a contemporary tool with support for scraping various popular websites on the Internet, including those heavily reliant on JavaScript and resembling applications rather than traditional static sites. Most actors are built using Puppeteer and Cheerio, modern tools proficient in scraping dynamic websites with JavaScript rendering capabilities. Apify can be employed to scrape data from diverse websites, and in cases where a specific actor is unavailable, users can utilize the generic web scraper or request the development of a custom actor.
Q. Is Proxy Usage a Must for Scraping on Apify?
Proxy usage is generally advisable for web scraping on Apify, especially when dealing with multiple pages. While scraping only a few pages may not necessitate proxies, extensive requests without proxy rotation could lead to the detection of bot activity by the target website, resulting in IP blocks. Rotating proxies are essential for efficient and uninterrupted scraping. Additionally, if geo-targeted data from regions different from the user’s location is of interest, the use of proxies from those regions becomes imperative.
Conclusion:
Apify stands out as a top web scraping solution, accommodating both developers and non-developers for scalable data extraction. Despite initial complexity perceptions, the guide illustrates that Apify is user-friendly, with a free tier suitable for smaller users.